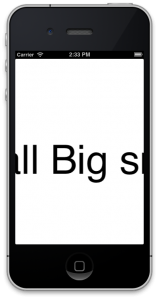
UILabelをズームするエフェクトの作り方メモ
ポイント
・CGAffineTransformMakeScale
・きれいに見えるようにLabelに使うフォントのサイズは大に
注意
UILableのテキストのサイズを変える方法として、
フォントのサイズを変更する方法も試したが、
これをやるとメモリが大量に食われていく、
一度プロファイルしてAllocを見ると凄いことになるのがわかる。
サンプルコード
[EffectKun.h]
@interface EffectKun : NSObject
+ (void)changeLabelSize:(float)size maxSize:(float)max label:(UILabel*)label;
@end
[EffectKun.m]
@implementation EffectKun
+ (void)changeLabelSize:(float)size maxSize:(float)max label:(UILabel*)label
{
if (label.font.pointSize < max) {
// 拡大後のフォントサイズに(きれいに見せるため)
label.font = [UIFont fontWithName:label.font.fontName size:max];
// 今回はセンターで位置合わせ
CGPoint centerBuf = label.center;
[label sizeToFit];
label.center = centerBuf;
}
float ratio = size / max;
if (ratio > 1) {
ratio = 1.0;
}
// 指定されたサイズで拡大(実際には縮小)
label.transform = CGAffineTransformMakeScale(ratio, ratio);
}
@end
[ViewController.m]
#import “ViewController.h”
#import “EffectKun.h”
#import <QuartzCore/QuartzCore.h>
@interface ViewController () {
CADisplayLink *timer;
UILabel *label;
int counter; // font sizeに関連づけ
}
@end
@implementation ViewController
– (void)viewDidLoad
{
[super viewDidLoad];
// 拡大後にちゃんとフォントが入るようにフレームをでっかく。
label = [[UILabel alloc] init];
label.textAlignment = 1; // alignment center
label.center = self.view.center;
label.text = @”small Big small”;
[self.view addSubview:label];
// カウンターの初期化
// loop
timer = [CADisplayLink displayLinkWithTarget:self selector:@selector(update:)];
[timer addToRunLoop:[NSRunLoop currentRunLoop] forMode:NSDefaultRunLoopMode];
}
– (void)update:(CADisplayLink*)sender
{
int maxSize = 100;
[EffectKun changeLabelSize:counter maxSize:maxSize label:label];
counter++;
// end
if (counter > maxSize) {
[timer invalidate];
timer = nil;
counter = 0;
}
}
@end

