Gutenberg Block入門用のその5です。今回はBlockの中に最新の投稿へのリンクを表示してみます。
以前の記事はこちら
- [WordPress5]ジェネレーターを使わずにゼロからBlockを作って仕組みを見ていきます
- [WordPress5]ジェネレーターを使わずにゼロからBlockを作って仕組みを見ていきます その2 esnext版
- [WordPress5 Tutorial] Blockを作って仕組みを見ていきます その3 cssを追加
- [WordPress5 Tutorial] Blockを作って仕組みを見ていきます その4 editor機能で文字を書けるようにする
- [WordPress5 Tutorial] Blockを作って仕組みを見ていきます その5 Toolbarで中央寄せ
前回までの記事とは違い、こんかいは、PHPがメインになります。javascriptの方は、save()では、何もしないで、edit側でPHPで生成したブログのタイトルを表示するだけです。
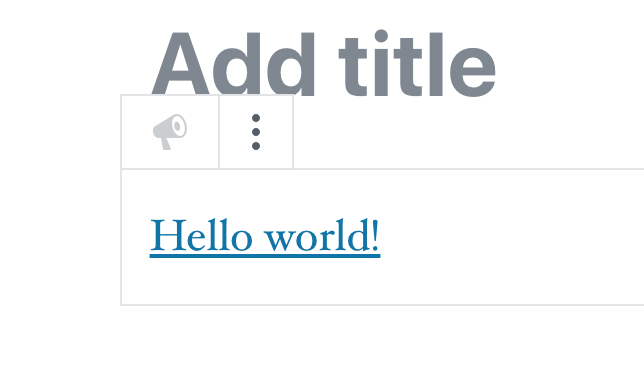
参考にしたサイトは、ここ「Creating dynamic blocks」です。出来上がるとこんな感じのBlockが使えるようになります。

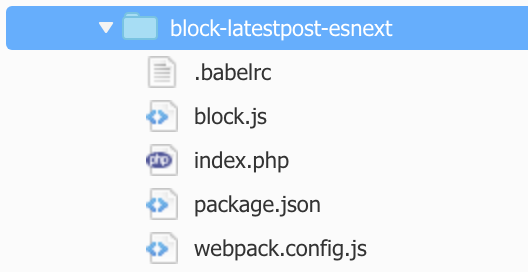
ファイル構成

index.php
register_block_typeの中で、render_callbackを設定しています。
<?php
/**
 * Plugin Name: Gutenberg Examples Latest Post EsNext
 * Plugin URI: https://github.com/WordPress/gutenberg-examples
 * Description: This is a plugin demonstrating how to register new blocks for the Gutenberg editor.
 * Version: 1.0.2
 * Author: the Gutenberg Team
 *
 * @package gutenberg-examples
 */
defined( 'ABSPATH' ) || exit;

function gutenberg_examples_latestpost_esnext_register_block() {

	function my_plugin_render_block_latest_post( $attributes, $content ) {
	    $recent_posts = wp_get_recent_posts( array(
	        'numberposts' => 1,
	        'post_status' => 'publish',
	    ) );
	    if ( count( $recent_posts ) === 0 ) {
	        return 'No posts';
	    }
	    $post = $recent_posts[ 0 ];
	    $post_id = $post['ID'];
	    return sprintf(
	        '<a class="wp-block-my-plugin-latest-post" href="%1$s">%2$s</a>',
	        esc_url( get_permalink( $post_id ) ),
	        esc_html( get_the_title( $post_id ) )
	    );
	}

	wp_register_script(
		'gutenberg-examples-latestpost-esnext',
		plugins_url( 'block.build.js', __FILE__ ),
		array( 'wp-blocks', 'wp-i18n', 'wp-data' ),
		filemtime( plugin_dir_path( __FILE__ ) . 'block.build.js' )
	);

	register_block_type( 'my-plugin/latest-post', array(
		'editor_script' => 'gutenberg-examples-latestpost-esnext',
	    'render_callback' => 'my_plugin_render_block_latest_post',
	) );
}

add_action( 'init', 'gutenberg_examples_latestpost_esnext_register_block' );
block.js
editの中で、wp.data の withSelect を使って、core-data で WordPressのEntityを操作しています。
const { registerBlockType } = wp.blocks;
const { withSelect } = wp.data;

registerBlockType( 'my-plugin/latest-post', {
    title: 'Example Latest Post',
    icon: 'megaphone',
    category: 'widgets',

    edit: withSelect( ( select ) => {
        return {
            posts: select( 'core' ).getEntityRecords( 'postType', 'post' )
        };
    } )( ( { posts, className } ) => {

        if ( ! posts ) {
            return "Loading...";
        }

        if ( posts && posts.length === 0 ) {
            return "No posts";
        }

        let post = posts[ 0 ];

        return <a className={ className } href={ post.link }>
            { post.title.rendered }
        </a>;
    } ),

    save() {
        // Rendering in PHP
        return null;
    },
} );
package.json
{
  "name": "01-basic-esnext",
  "version": "1.0.0",
  "license": "GPL-2.0-or-later",
  "main": "block.js",
  "devDependencies": {
    "babel-core": "^6.25.0",
    "babel-loader": "^7.1.1",
    "babel-plugin-transform-react-jsx": "^6.24.1",
    "babel-preset-env": "^1.6.0",
    "cross-env": "^5.0.1",
    "webpack": "^3.1.0"
  },
  "scripts": {
    "build": "cross-env BABEL_ENV=default NODE_ENV=production webpack",
    "dev": "cross-env BABEL_ENV=default webpack --watch"
  }
}
webpack.config.js
module.exports = {
    entry: './block.js',
    output: {
        path: __dirname,
        filename: 'block.build.js',
    },
    module: {
        loaders: [
            {
                test: /.js$/,
                loader: 'babel-loader',
                exclude: /node_modules/,
            },
        ],
    },
};
.babelrc
{
	"presets": [
		[ "env", {
			"modules": false,
			"targets": {
				"browsers": [
					"last 2 Chrome versions",
					"last 2 Firefox versions",
					"last 2 Safari versions",
					"last 2 iOS versions",
					"last 1 Android version",
					"last 1 ChromeAndroid version",
					"ie 11"
				]
			}
		} ]
	],
	"plugins": [
		[ "transform-react-jsx", {
			"pragma": "wp.element.createElement"
		} ]
	]
}
動作確認
今回もesnextでソースをかいているので、buildしてから試します。
npm install
npm run build
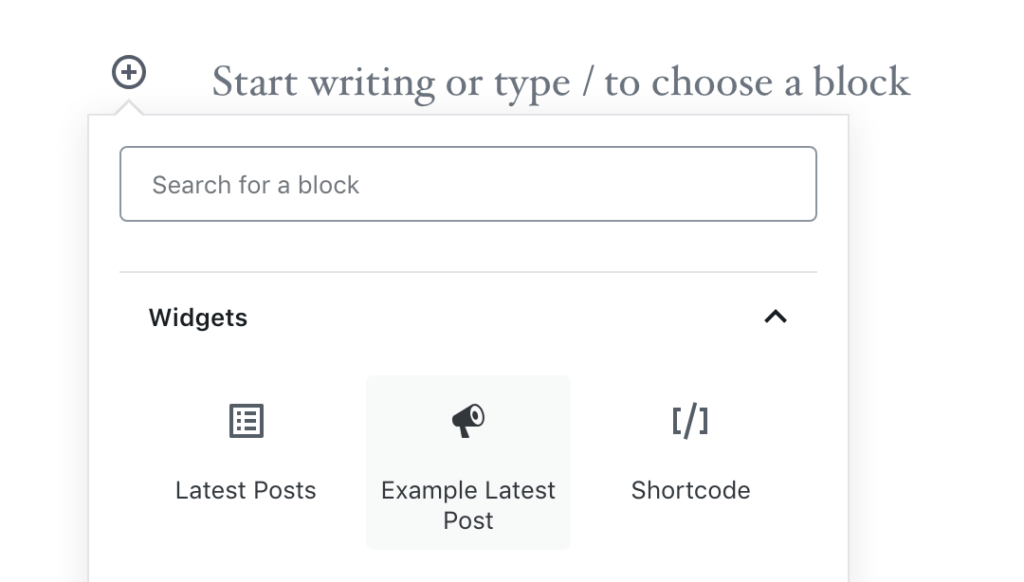
PluginをActivate した後、このBlockが表示されたらOK.

